Typeface Academy
Typeface for Salesforce Marketing Cloud
Typeface's integration with Salesforce Marketing Cloud lets you create in the flow of your work. This guide covers how to install and use the Typeface app for Salesforce.
Category
Integration
Channel
Email
Metrics
Open rate
Click through rate
This is for
Marketing
Goal
Generate creative variations and dynamic content within Salesforce
Installation and configuration
Follow these installation instructions to setup Typeface in Salesforce Marketing Cloud.
In Salesforce Marketing Cloud, go to Setup > Apps > Installed Packages.
Click the ‘New’ button in the top right-hand corner.
Give it a name and description. E.g. Name: Typeface custom content block. Description: Generate personalized, on-brand content using Typeface.ai.
Next, you will add two components – one to enable the Typeface custom block, and one to allow it to access Salesforce Marketing Cloud APIs.
Install the first component: Click Add Component and select ‘Custom Content Block’. Name it ‘Typeface’. In the Endpoint URL field, enter the URL https://sfdc-cb-prod.typeface.ai. Click Save.
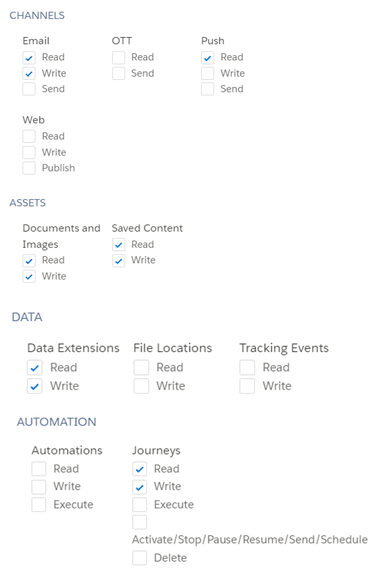
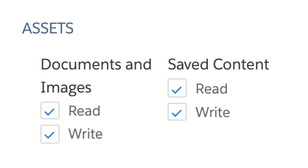
Install the second component: Click Add Component and select ‘API Integration’. On the screen to choose Integration Type, select Server-to-Server. Set Server-to-Server Properties, select the Read/Write Scopes under ASSETS (Documents & Images and Saved Content). Click Save.
Note: You will need the ClientId, Client Secret, Authentication Base URI, and REST Base URI in the next step.
If you are also getting set up to use Typeface Arc, please see Additional permissions needed for Typeface Arc below. Note the Typeface team needs to enable Arc for you. You do not need to set up these permissions if Arc is not enabled for you.
![image.png]()
Confirm licenses - Go to the ACCESS section as shown below and either select users or select the option to ‘license everyone’.
Then go over to the Typeface app, Settings → Connectors. You should see a Salesforce card here.
![MicrosoftTeams-image (133).png]()
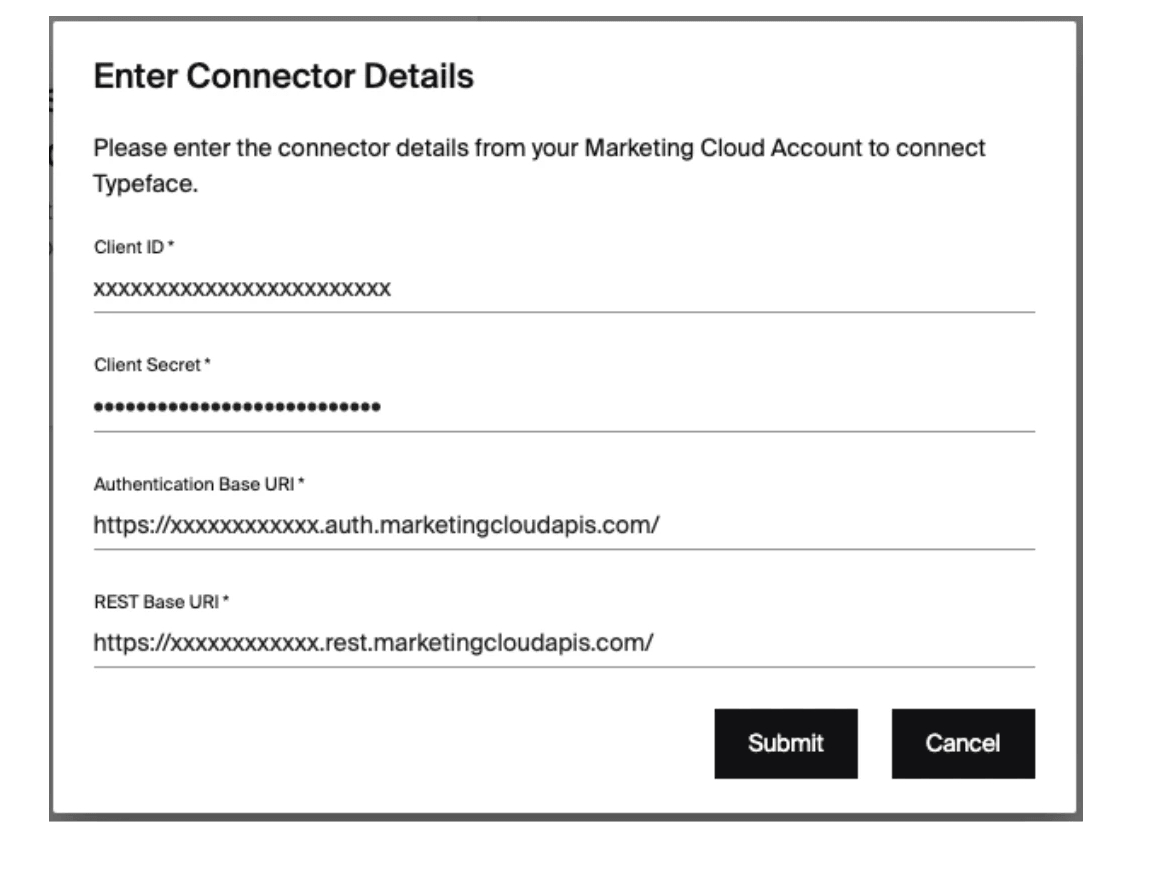
Click on ‘Connect’ and fill in the details using the credentials from your Salesforce Marketing Cloud environment.
![image.png]()
Note: after you have saved the connector, the client secret will not be visible on the connector screen.
Once it is complete, you are now good to go for publishing content from your Typeface account to Salesforce Marketing Cloud.
Business Unit Considerations
Install Typeface to your parent BU. From the parent BU installation you can then manage access to the package for other child BUs.
If you already installed Typeface in a child BU, delete it from the child BU and re-install it in the parent BU as explained above.
Set up for collaboration
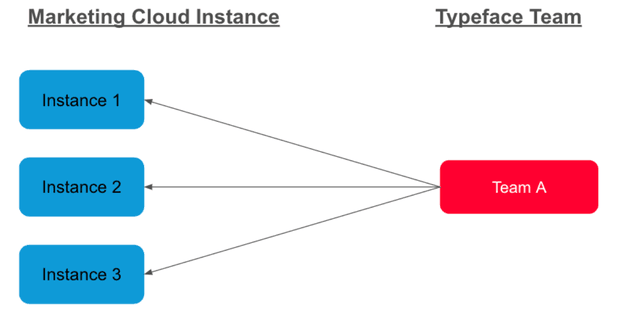
The connector on Typeface is at a team level and maps to 1 Salesforce Marketing Cloud instance. There are two options for configuring your Typeface & Marketing Cloud Instances to collaborate with others on your teams.
Option 1: 1-1 mapping of Marketing Cloud Instances & Typeface Teams
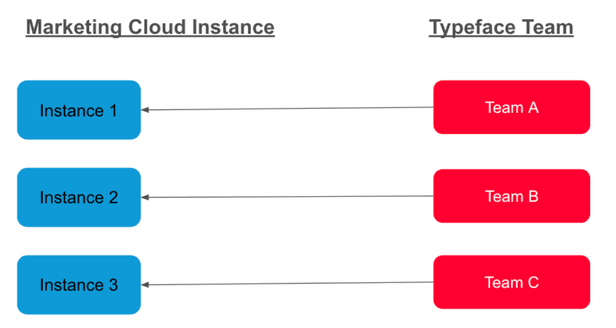
Option 2: One Marketing Cloud Instances connected to multiple Typeface Teams
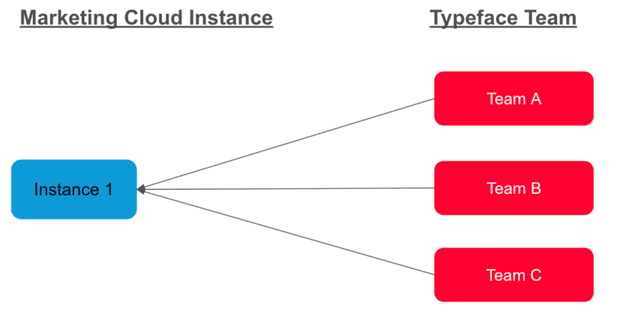
Note on Unsupported configuration: Because the Salesforce connector on Typeface is set up at a team level, one Team in Typeface cannot be connected to multiple Marketing Cloud Instances.
Adding Typeface content blocks
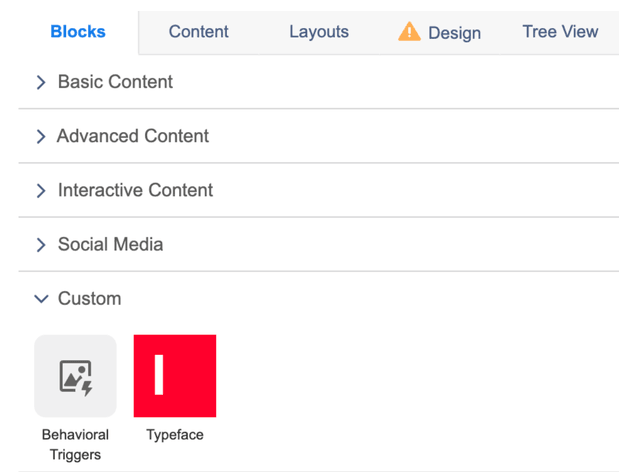
You can create content by adding a Typeface content block into Content Builder. Simply drag-and-drop the Typeface icon from the left-hand side of your screen into your main content area.
Organizing Typeface content blocks
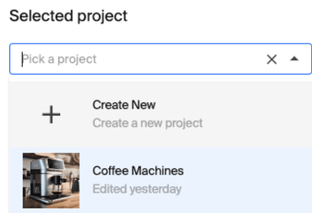
When creating a new content block, start off by choosing a team & project to help keep your work organized. For example, agencies that support multiple clients can create a team for each client. Or product marketing teams can create a new project for each product line they are working on.
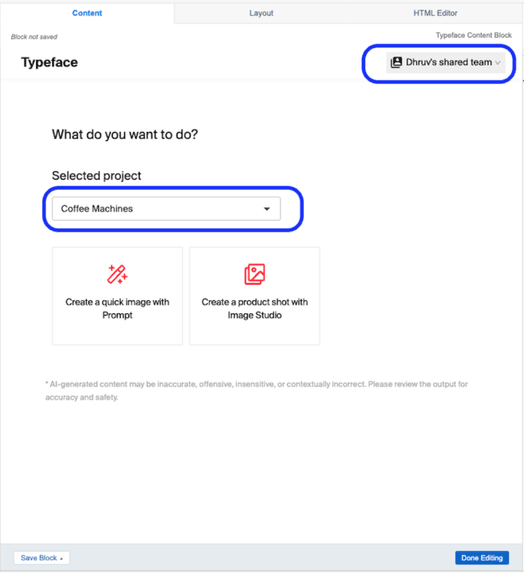
To create a new project, use the project selector dropdown and select ‘Create New.’ You will be able to name the project. To create a new team, reach out to your Typeface customer success partner.
Creating images in Typeface content blocks
After selecting your project, you can start creating content using a simple prompt or in Image Studio.
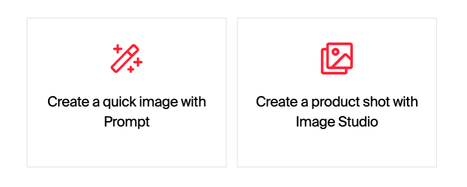
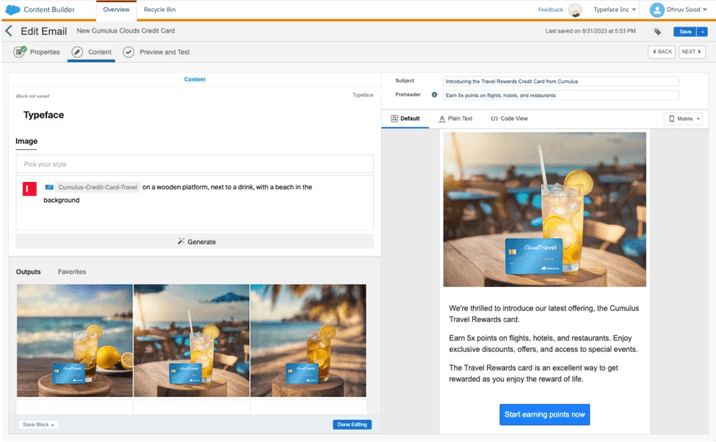
If you decide to create using a simple prompt, a prompt box will appear in Content Builder. Type an image prompt, use ‘/Asset’ to upload and use brand assets like products, and then click “Generate.” Add an image you like by clicking the ‘+’ button.
If you want to generate a product shot, Image Studio will appear in Content Builder. Learn more about how to create AI photography.
Tip
Tip
Click on the Typeface icon in the prompt box to adjust the aspect ratio and image resolution before generating your image.
Creating text in Typeface content blocks
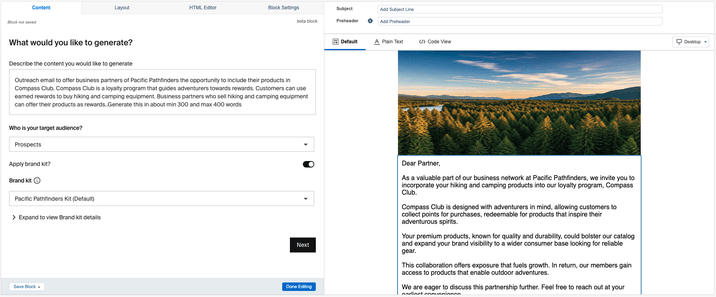
With Typeface, you can generate pieces of text such as the body of an email. Start by clicking "Generate text" in your content block.
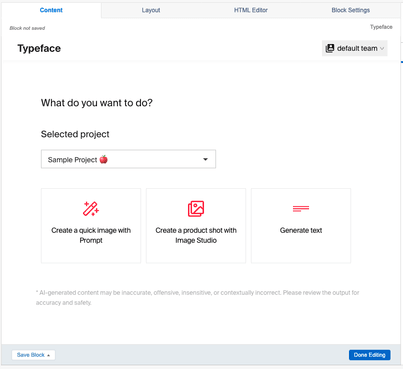
The marketing copy can be personalized to a specific audience that has been pre-defined in Typeface (or imported from Data Cloud).
To create content in your brand voice, you can set up a Brand Kit and train a voice in the full Typeface app.
Delivering dynamic content
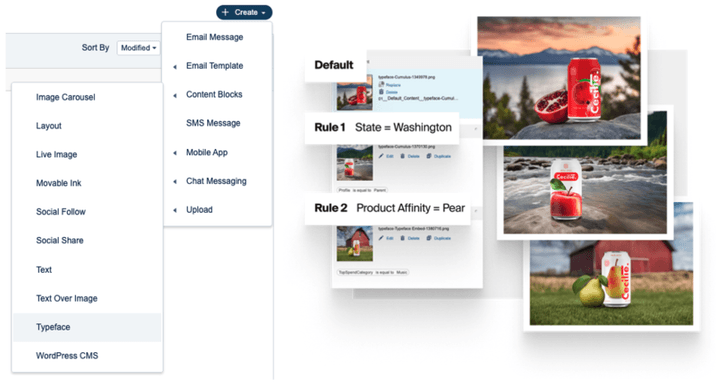
You can use Typeface to create multiple variants and then personalize the email to people based on profile attributes.
To do this, start from the Content Builder homepage. Click “+ Create” and then generate new Typeface content blocks. These are the image variations you’ll use for each audience or region.
Then, within an email, drag in a Dynamic Content Block. This lets you send different groups of email subscribers different content based on a set of rules. For each rule you add, you can select the Typeface Content Block you’ve created that matches that audience.
Tip
Tip
Label each Typeface Content Block so it’s easy to find. E.g. “Cecilie Pear Juice – Iowa" and “Cecilie Pear Juice – New York.”
Adjusting image layout
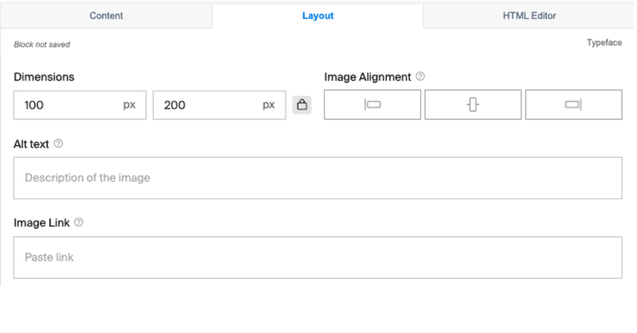
After you have added a Typeface image to your email, you can make final adjustments by navigating to the Layout Tab. Here you can specify the dimensions, image alignment, alt text, and image link.
Try it out
Get started creating your first marketing email with Typeface for Salesforce Marketing Cloud. Once you have a marketing email in mind, take the following steps:
If you haven’t already, sign up for Typeface.
Create a template-based email in Content Builder.
Drag-and-drop the Typeface icon into your email.
Generate an image (refer to our prompt guide for ideas).
FAQs
Where are all the images that I create in Salesforce Marketing Cloud stored?
Images created with the Typeface Content block are natively stored as a Content Builder asset and served via Marketing Cloud’s CDN. This significantly reduces the overall size of the email and ensures deliverability best practices are followed. For example, this improves how email renders on clients like Gmail.
Note: by default, the images are stored in a folder named ‘Typeface Generated Assets.’ You may move the images to a different folder without impacting the image’s URL.
What should I do if I encounter the error "Failed to verify your credentials" while setting up the Typeface connector?
This indicates one of two problems:
That the details entered (Client ID, Client Secret, Authentication Base URL, or REST Base URL) are not entered correctly.
On the Salesforce Marketing Cloud instance, when configuring the app, the required asset permissions are not enabled:

Need more help? Contact support@typeface.ai..

Next Article
AI product photography
Typeface’s Image Studio mimics professional photoshoots at a fraction of the cost. Using Image Studio for AI product photography gives you control over product placement and 50+ decorations to spruce up photos.
Read more