Typeface Academy
How to edit images using AI
Typeface offers a rich, AI-based editing experience that helps you simplify image editing. This guide shows you how to extend images, add filters, adjust lighting and colors, and much more.


Image creation and editing workflow
Here’s how users typically complete an end-to-end creation and editing workflow in Typeface:
Select "Create with Image Studio" from the template library or within the copilot in a blank document.


Generate an image using the Visual Image Studio or through text-to-image prompt generation on a blank canvas.
After generating the image, use the editing toolbar on the left to make adjustments.
Use built-in tools or native Adobe Express integration to add text, upload logo or graphical elements, and stylization
For final fit-and-finish, users can also download an image as a PSD file to refine further in Photoshop or other photo editing tools.
Tip
Tip
Before creating and editing images, set up your Brand Kit to train on your brand image styles, asset library, and audiences to ensure brand consistency.
How to access image editing
Depending on where your image is placed, you can tap into image editing in three different ways:
Images on your document: If you’ve just generated an image and added it on your document, click on the image and select “Edit Image”.
![image.png]()
Images under “Most Recent”: If the image under “Most Recent” instead of the document, hover over the image and select the expand option.
![image.png]()
Images in Image Studio: After you created an image in Image Studio, simply click on your preferred image and the edit options will automatically show up.
![image.png]()


Overview of image editing tools
Typeface has a wide selection of image editing tools. Here’s a quick rundown on what’s on your toolbar:
Select: Brush areas on the image to erase or add (inpaint) with a short description
Auto-edit: Automatically apply lighting, shadow, and other presets to the image
Text: Overlay text on the image
Extend: Use AI to crop or extend the image to another resolution and aspect ratio
Auto-crop: Specify up to 4 different sizes to crop/extend your image
Effects: Add filters, text, stickers, or crop your image to size.
Adobe Express: Access Adobe Express's templates and rich media editing tools within Typeface
Add, erase, or inpaint a selected segment
The “Select” tool offers two approaches for precise editing.
Automatic segmentation: the tool analyzes your image and identifies distinct editable regions like sky, background, or specific objects. Simply hover over these regions and click to select them.
Manual brush selection: this lets you paint over exact areas you want to modify. Once you've selected an area, you can provide a short prompt to modify the selected area or choose to “erase” elements entirely.
Choose from multiple variations for each edit. If you're not satisfied with an edit, you can quickly revert to any previous version using the history panel at the bottom of the interface.
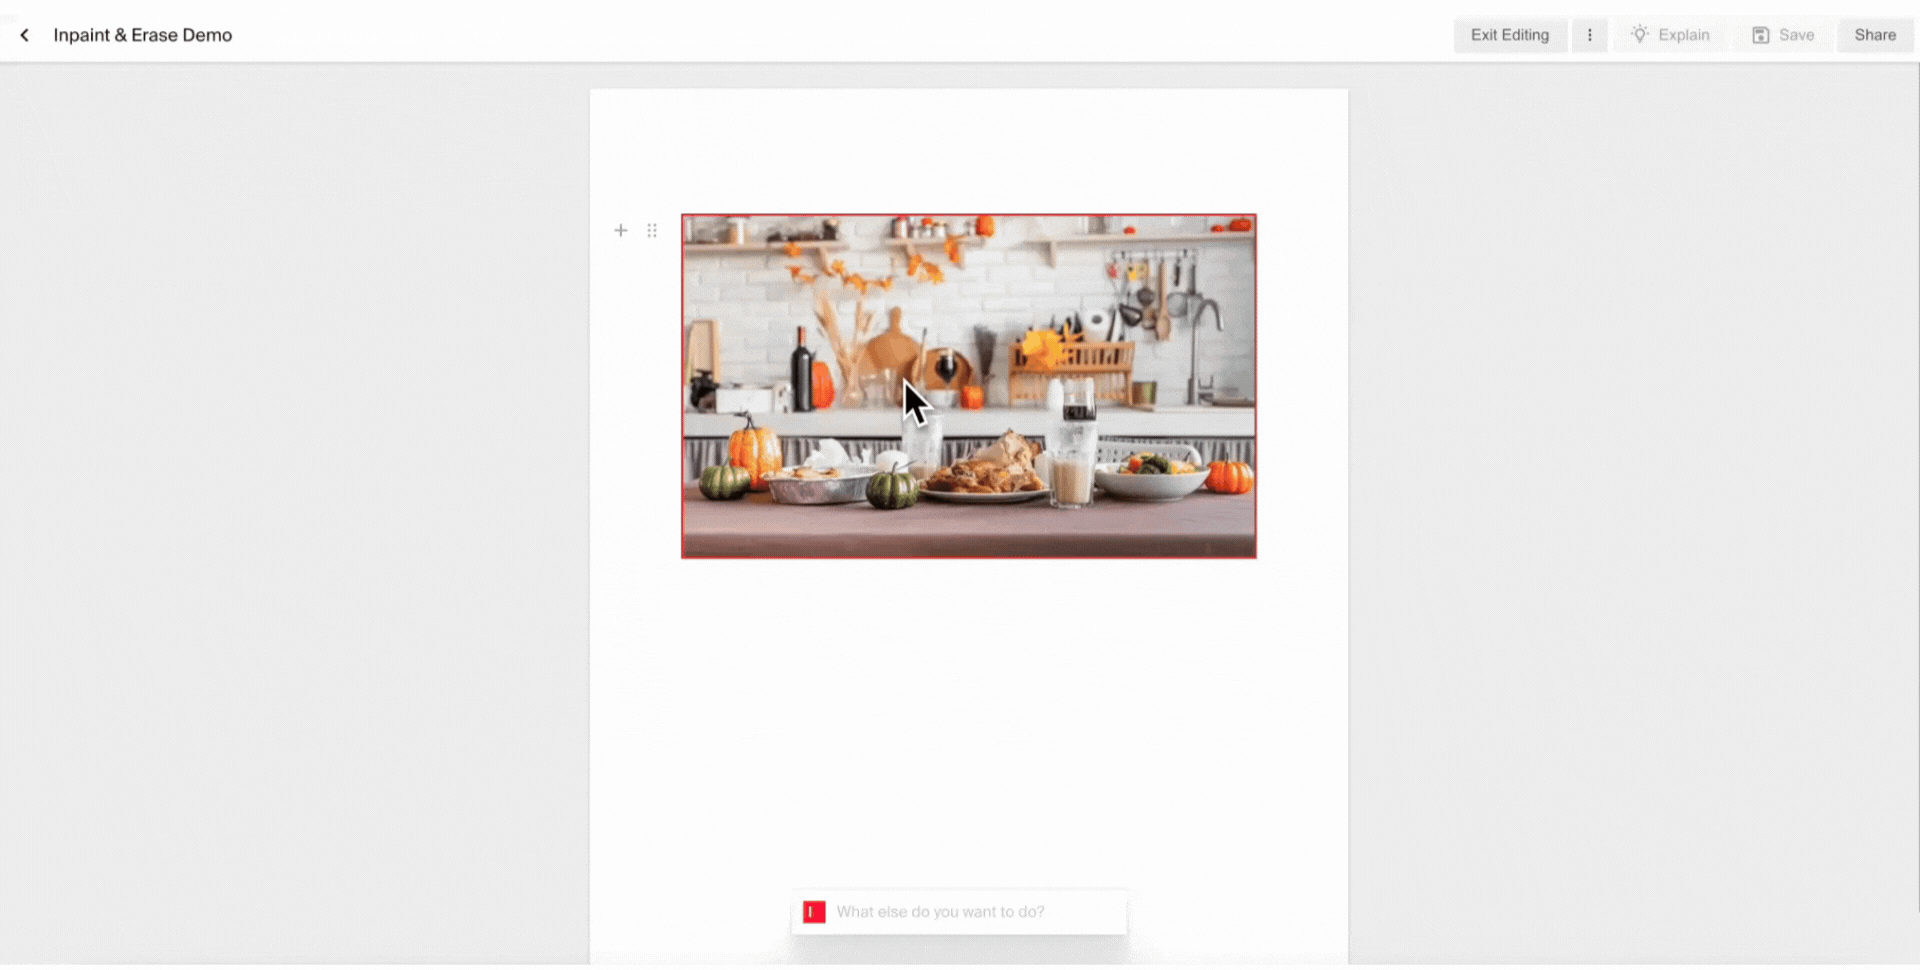
Here are two example workflows where we used “Erase” and “Inpaint” to refine a generated photo to its final state:


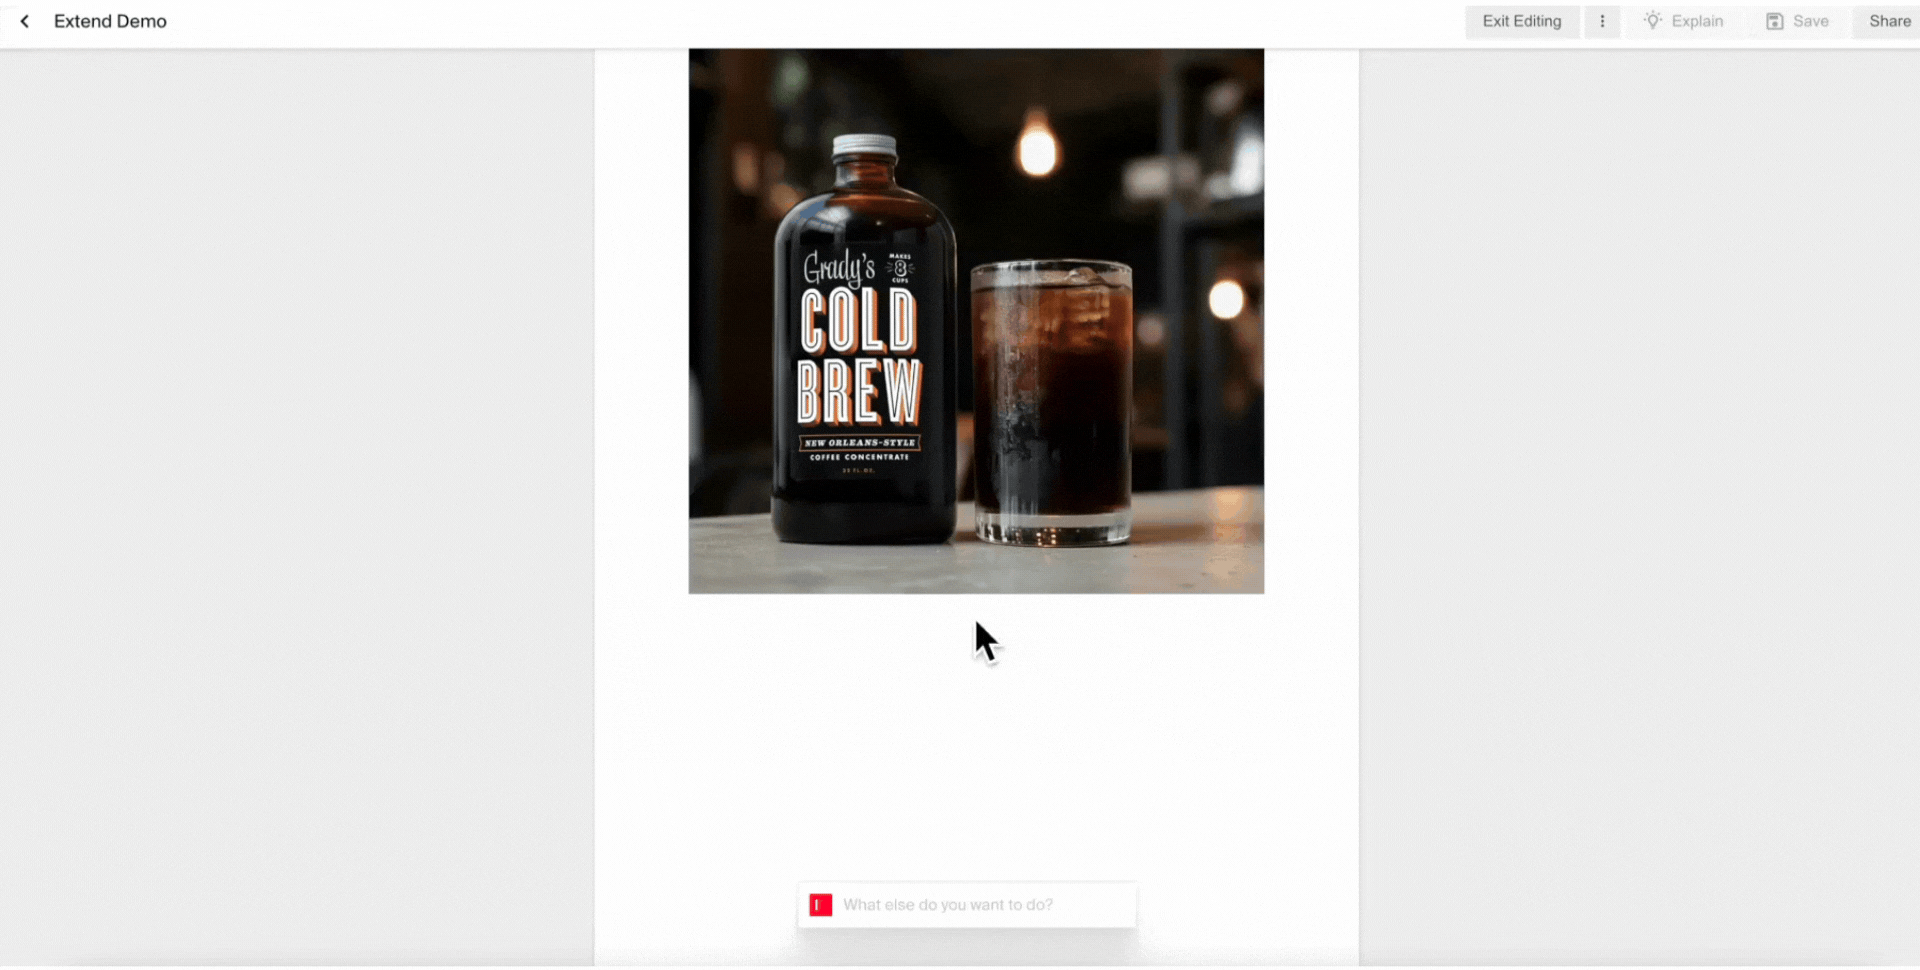
Extend or outpaint the images borders
Generative Extend uses AI-powered outpainting to expand images beyond their original boundaries. This is useful when adapting images across different formats.
To use Generative Extend:
Select your image and click 'Extend'
Choose your target dimensions from preset aspect ratios or enter custom measurements
Position your original image within the new frame using the grid overlay
Click 'Regenerate' to create the extended version
Choose from several variations of the extended areas. If needed, you can refine specific areas using the Select or Brush tools for additional editing.
Auto-crop and resize images
Adjust the size of your images with the “Auto Crop” feature. Change it to square, landscape, portrait, banner, widescreen, or any custom size. You can also adjust the image resolution here.


Adjust lighting, color, and shadows
With Generative Lighting in “Auto-Edit”, you can auto-adjust lighting and colors.
Select from the color, lighting, or shadow options or combine them to fine-tune your adjustments. Typeface automatically generates several variations for you to select from.


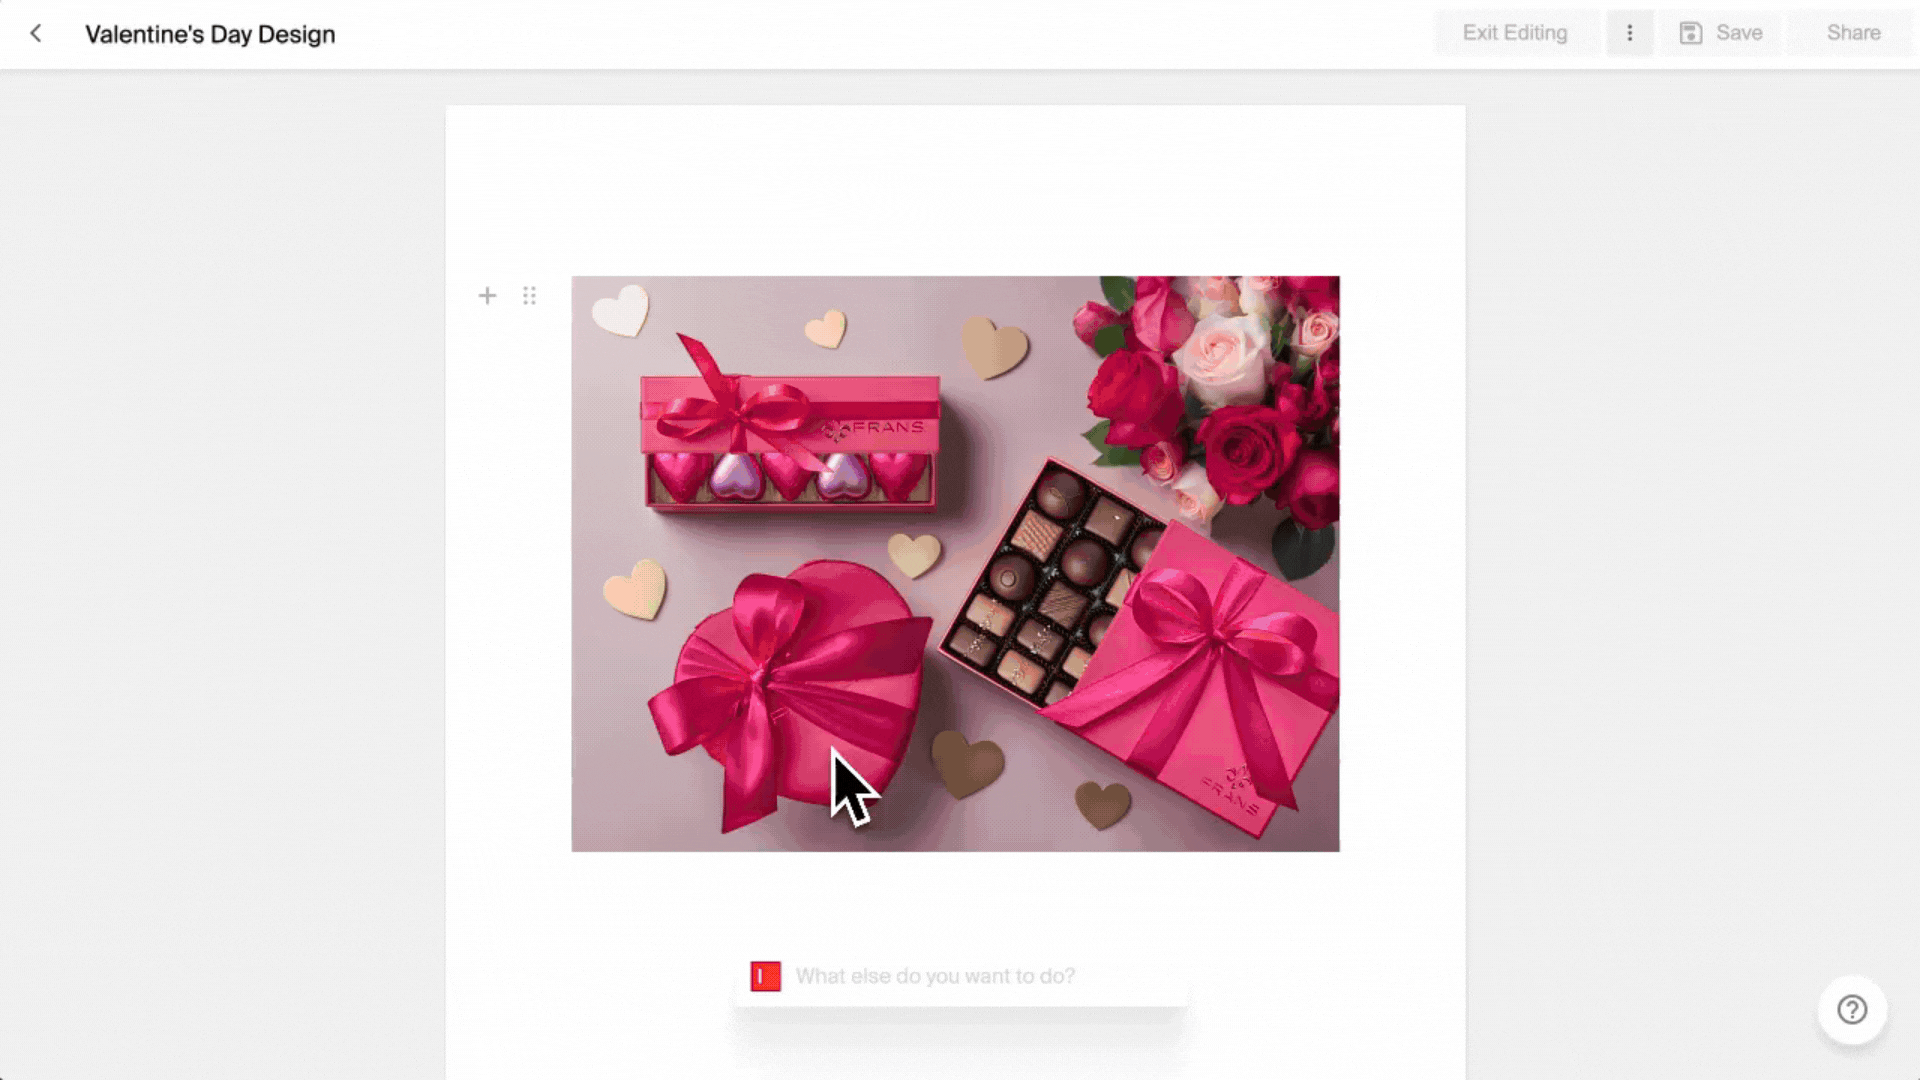
Apply effects
Apply various effects by clicking on 'Effects'. Here, you can design your image with filters, add text, stickers or adjust the image's size to fit your needs.
Filters: Select from the various filter options available.
Text Designs: Choose from the wide array of text design templates on offer.
Text: Add a personal message or caption to your image with the text feature.
Stickers: Liven up your image with fun emoticons/shapes or bring your own Stickers.
Transform: Crop your image to suit different aspect ratios like Square, 4: 3, 3:4, 16:9, Banner or Custom.
![Applying filters to AI generated image]()


Note that for adding text, you have two options:
The Text tool for basic captions and messages with customizable fonts and colors
Text Design templates for more elaborate typography layouts, perfect for social media posts or marketing materials


Using Adobe Express
By selecting the Adobe Express icon, the editor launches with your image pre-loaded, giving you immediate access to:
Professional color adjustment tools for fine-tuning lighting, contrast, and saturation
Adobe's extensive template library for quick adaptation to different marketing formats
Advanced typography options and design elements
Complete library of graphics, icons, and shapes
To use the integration:
Generate your image in Typeface
Click "Edit image" and select Adobe Express
Choose from Adobe's template library or start with a blank canvas
Apply edits and design elements as needed
Save your finished work back to Typeface or export as a PSD file
Exporting and sharing your edited photos
You can download your images in PNG, JPEG, or WEBP. If you plan to do further editing in software like Photoshop, you can download your image as a .PSD file, preserving all layers for easy adjustments.


Try it out
Get started on editing your images with AI. To learn the topics covered in this guide, try out the following:
Generate an image in Image Studio or through text-to-image prompt generation
Edit the image using the tools described above
Download the image to further edit or use in your campaigns
FAQs
How do I upscale my image?
You can upscale your image 2x or to any custom dimension when you export.


How do I edit my original image prompt?
Besides using editing tools, you can also choose to edit your original image prompt. To do this, click on "Edit image" and edit the prompt box under your image. Press enter to regenerate the image.
Need more help? Contact support@typeface.ai.